Some developers don´t feel confortable using VSCode, but… you can run Q# on Jupyter Notebook.
What is Jupyter Notebook?
The Jupyter Notebook is an open-source web application that allow in-place code execution alongside instructions, notes, it lets you create and share documents that contain live code, equations, visualizations and narrative text.
Do you want to Learn Quantum ?
Learn with Quantum Katas
Microsoft created a series of self-paced tutorials to learn Quantum with Python and also Q# programming. This tutorials help you understand concepts like superposition, measurements and more.
Try Katas:
- Online: Click here . You will launch a new browser tab with Binder, wait until you have everything ready to start with katas, usually you have to wait a couple of minutes until you get Jupyter Notebook online. Once it loads, you will see the list of tutorials and instructions and you are ready to test and learn! Once you click on a tutorial, for example ComplexArithmetic you will get different exercises for you to edit and once you are ready just press ctrl + enter or press button Run to check if your code is ok.

- If you want to have katas locally you have all instructions to clone the environment in the following link.
Also a friend of mine Sarah Kaiser, a Quantum MVP started a book to help you to learn Quantum computing with Python and Q#, you can check it out here.

Using Q# with Python and Jupyter just got soo much better!
Prepare the environment to work with Q# in Jupyter notebook
To work with Jupyter we need to install IQ# Jupyter kernel, which is an extension primarily used by Jupyter and Python to the .NET Core SDK that provides the core functionality for compiling and simulating Q# operations.
1 – Install Miniconda.
2 – Once Miniconda is installed, you can use the conda command to install any other packages and create environments, etc. Lets open Anaconda Prompt (I am using Windows Terminal Preview), and type “conda” to check if everything installed correctly.

3 – We now need to create our environment (conda envs are especially useful, as you can specify things that are not Python packages as part of an environment (like if you needed a particular version of some .NET tooling, or the IQ# kernel that powers Python ↔ Q# interoperability)), with required packages incluiding : Jupyter notebook and IQ# (IQ# kernel to run your existing Q# Jupyter Notebooks.)
To create our environment type: conda create –n NAMEFORENV –c quantum-engineering qsharp notebook
![image_thumb[6]](https://ivanatilca.com/wp-content/uploads/2020/07/image_thumb6.png "image_thumb[6]")
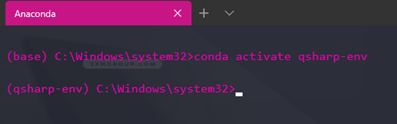
4 – Lets activate our environment.

5 – To verify installation and populate package with QDK run the following command: python –c “import qsharp”
![image_thumb[12]](https://ivanatilca.com/wp-content/uploads/2020/07/image_thumb12.png "image_thumb[12]")
6 – Type the following command to start the Jupyter notebook: “jupyter notebook” which will automatically open jupyter in your browser, if it doesn’t you can copy paste the url provided.
![image_thumb[16]](https://ivanatilca.com/wp-content/uploads/2020/07/image_thumb16.png "image_thumb[16]")
7 – Select “New” at the top right corner and select Q# to create a Jupyter notebook with a Q# Kernel.

8 – Let´s try the “GenerateRandom” operation we created in our previous article in VSCode.

I will be posting more information while i get deeper into this new world.
Take care!


Leave a Reply