
This post is different from the topics I usually post. But I took Scott Hanselman’s advice to start using my blog to document things and learn, so I decided to document something that I also learned from him, which is how to get my Windows Terminal adjusted.
Scott Hanselman’s Recommended Blog. How to make a pretty prompt in Windows Terminal with Powerline, Nerd Fonts, Cascadia Code, WSL, and oh-my-posh
In my case, I tried several times to follow Scott’s tutorial step by step, but many things have changed since 2019 when he wrote that article and I would also like to show how I configure everything with my favorite colors.
Requirements:
- Install Git
- Install Windows Terminal
- Install Powershell (I have version 7.1.3)
- Download Cascadia Code font (I have version2102.25)
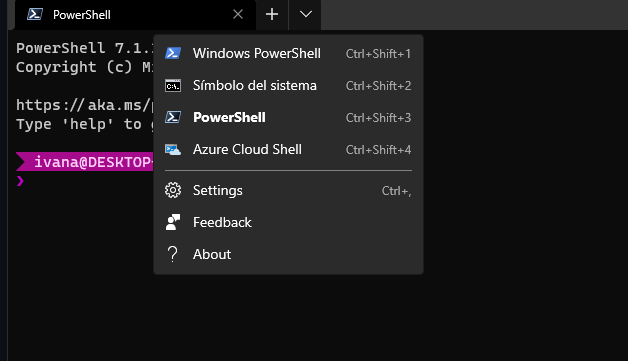
Once you have that open up your Windows Terminal as administrator and go to settings by selecting the arrow at the top bar.
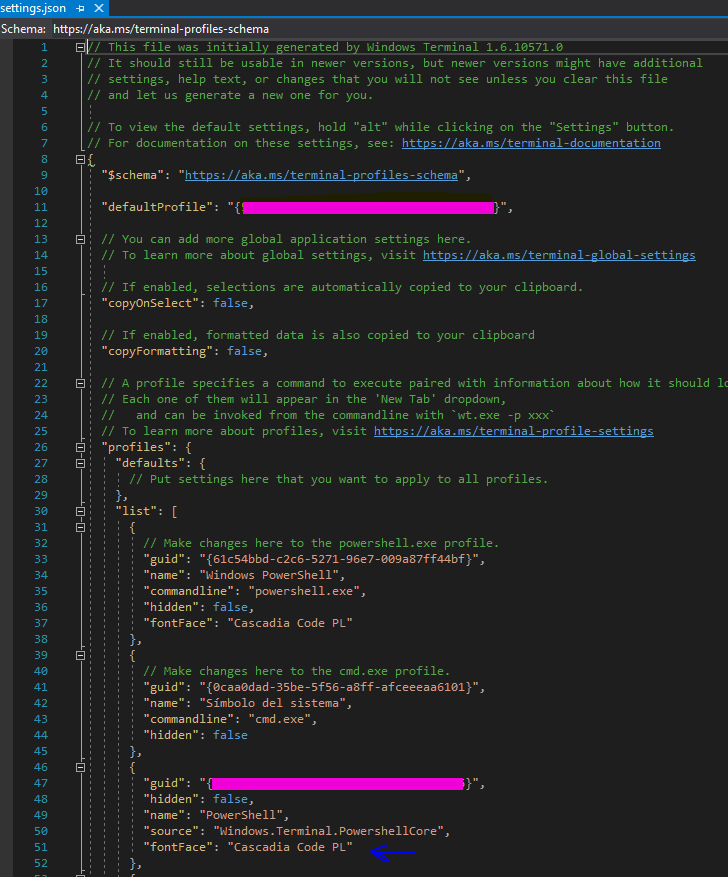
Once you open settings.json replace the Defaultprofile ID with the one corresponding to powershell and include
“fontFace”: “Cascadia Code PL”
Then on Powershell write and accept the following installation.
- Install-Module oh-my-posh -Scope CurrentUser -AllowPrerelease
Open up Powershell profile by writing.
- notepad $PROFILE
Inside profile write
- Set-PoshPrompt -Theme YOURSELECTEDTHEMENAME ex: Set-PoshPrompt -Theme Paradox
And there it is … now… I did change the colors of them. By going to Documents\PowerShell\Modules\oh-my-posh\3.129.1\themes and editing my selected theme json

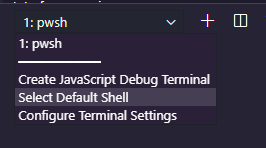
Now, to add it to visual studio code. Open VSCode, go to Terminal, new terminal then under the plus icon… select “Select Default Shell” and pick the one you want to use.


Leave a Reply