In case you want to know step by step how to create an installer for your HL2. Step by step considerations are in this post.
Software requierements
- Visual Studio 2019
- Once you install the version you need, make sure you go to “Individuals components” in Visual studio installer.
- And install the following items:
- Windows 10 SDK version 10.0.19041.0 or 10.0.18362.0
- USB Device Connectivity (required to deploy/debug to HoloLens over USB)
- C++ (v142) Universal Windows Platform tools (required when using Unity)

- Unity (I am working with 2020.3.13f1).
- Make sure you install Universal Windows Platform and Windows Build Support (IL2CPP)

- A hololens 2 device enabled for Developer Mode.
- Inside Hololens:
- Settings > Update > For Developers > Enable Developer Features. Optional : Device Portal.
- Windows 10 enabled for Development: In the computer, you will be using to deploy the app, make sure you have Windows enabled for Dev by going to Settings > Update and Security > For developers > Developer Mode enabled.
Now that we have everything installed let’s see how to create the appx.
Inside UNITY
Once you have your project configured to work for Hololens 2. You need to go to Build Settings and make sure your settings indicate the following options. Once everything is ready, you need to press the Build button.

Unity will then request a folder to store the files. Once it finishes, you will get a new Visual Studio project.

Open it up in Visual studio and configure Solution configuration to “Mater” and Solution Platform to “ARM64”

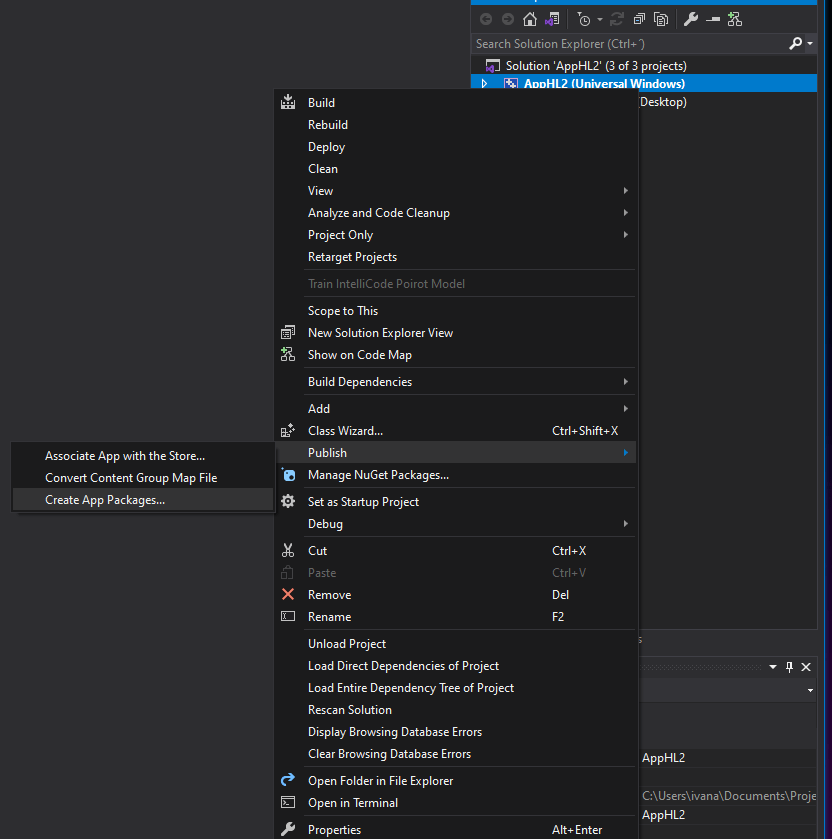
Then under solution explorer, right click the Universal Windows project and select Publish > Create APP packages.
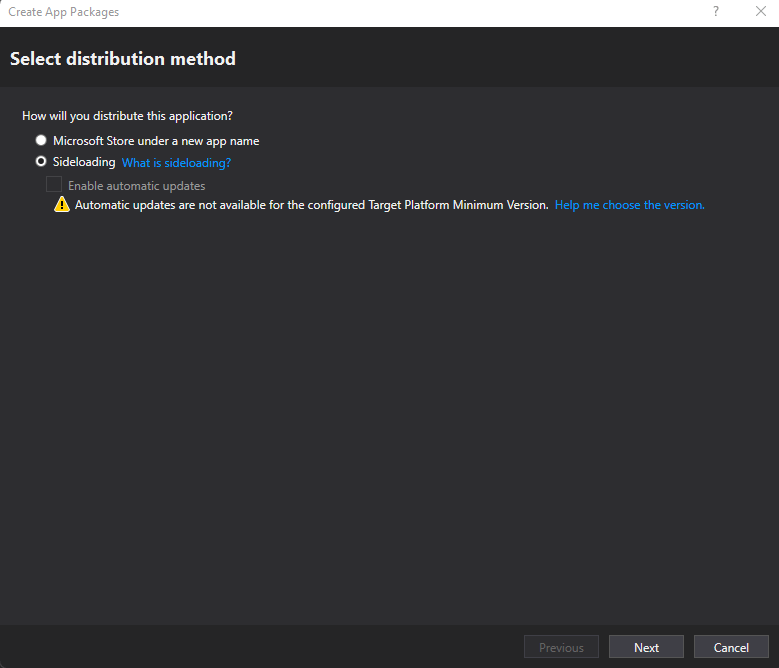
Select the opcion “Sideloading” and press Next.
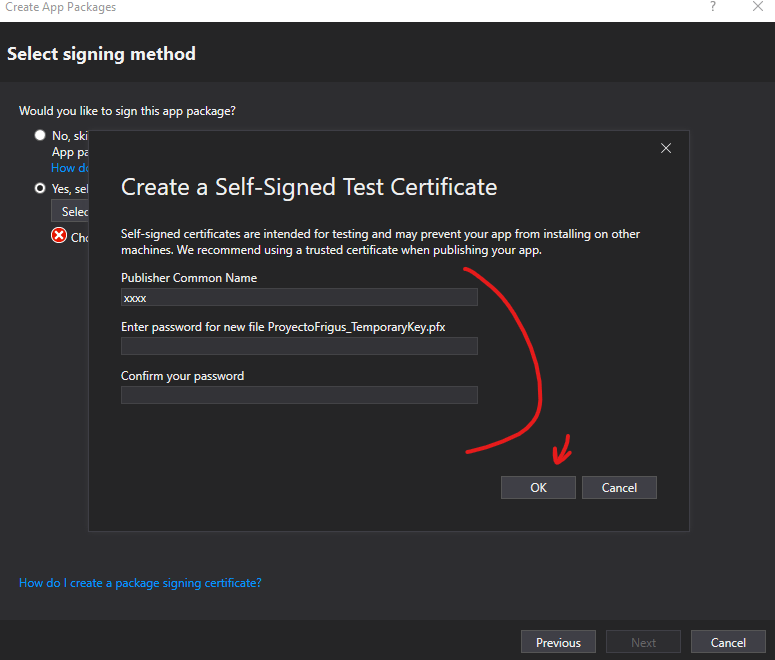
In the signing methos select the opcion “Create”

Then create a Self-signed test certificate by filling the Name, password and press OK.
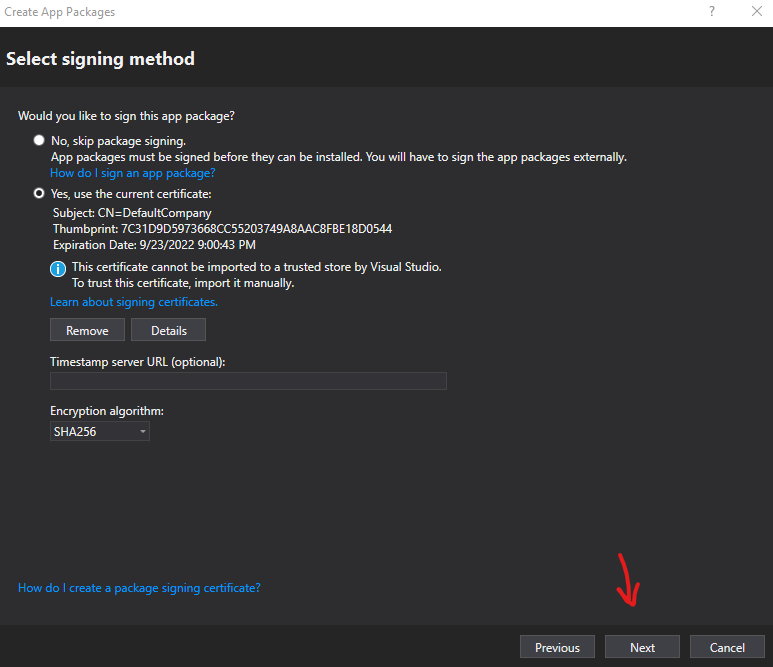
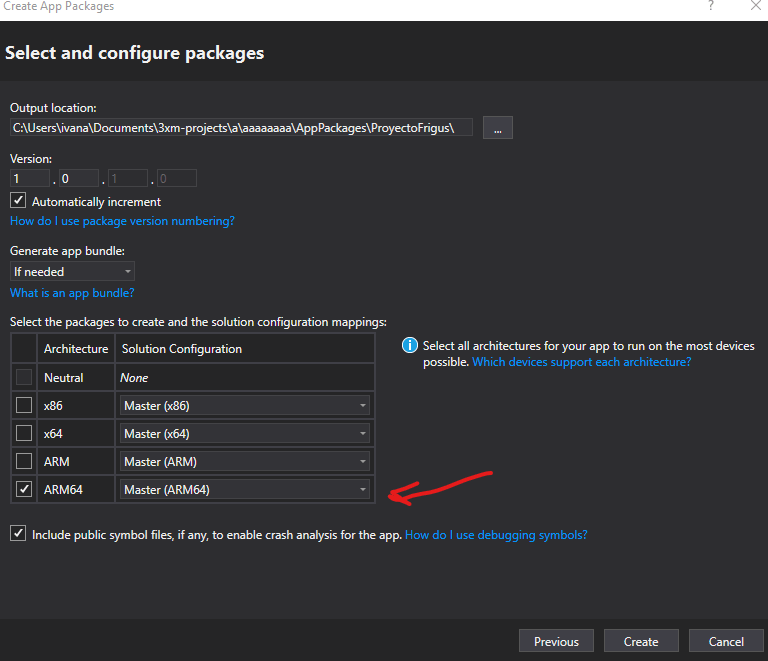

Once it

The APPX file is the one that the user needs to install to Hololens 2 through the portal.
Happy coding!


Leave a Reply